Hello! I got the real Fastbot weeks ago and did the assembly.
It all seemed to work well until yesterday, when I loaded the ROSArduinoBridge onto the onboard Arduino Nano. Since then, I can’t SSH into it and show error message : ssh: connect to host 192.168.2.20 port 22: No route to host
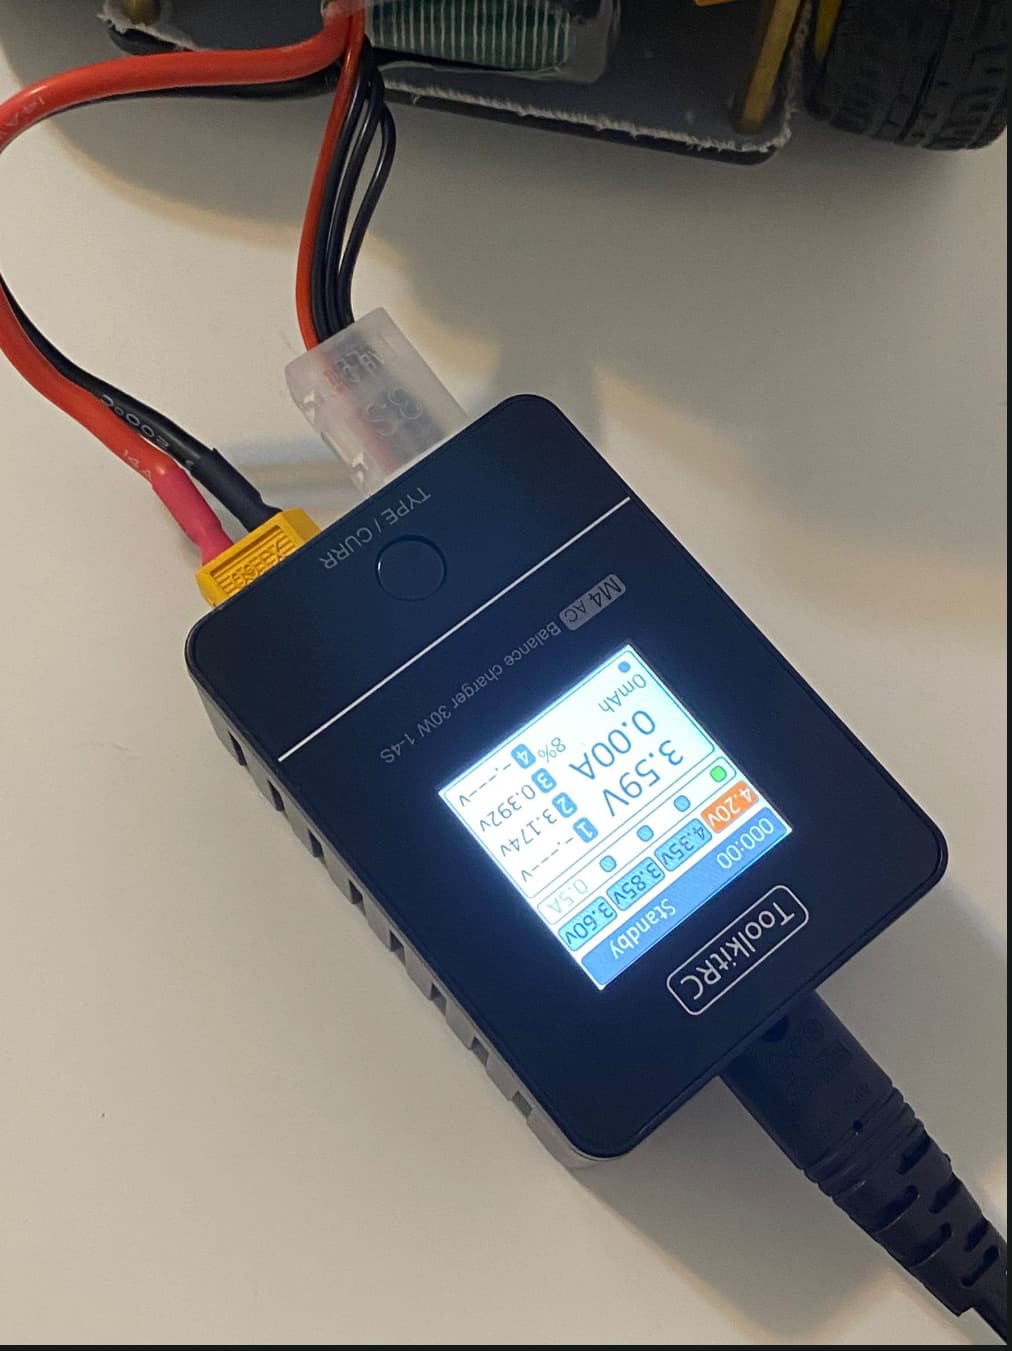
I guess the LiPo Battery is out of charge, and I have been trying to charge it with the ToolkitRC M4 AC Balance Charger without success. By default, I set it to 4.2V per cell and 0.4A; Yet, it only hangs on Standby and does not charge at all.
The good part is that everything else worked fine for me, except for this one issue.
Is there any way you can help with this?
Hi @gtfrans2re ,
Welcome to this Community!
To charge the battery of the FastBot your need to do the following steps:
- First connect the battery charger to power supply without connecting the battery to it.
- Make sure the amperage is set to 1.0A. You need to short press the button to cycle through the ampere options which are: 0.5A, 1.0A, 2.0A and 2.5A, respectively.
- Then you need to set the voltage to 4.20V. You need to long press the button to cycle through the voltage options which are: 4.20V, 4.35V, 3.85V and 3.60V, respectively.
- Then you connect the two cables of the battery.
i. The yellow plug is unidirectional, so you can plug it in in only one direction.
ii. The other one, the series cell charger plug, you need to plug it in with the red wire to the right and the 3 black wires to the left. Red on right side - remember R for red, R for right. You need to make sure that the black wires are connected from the left end terminal. The serial charger port has 5 terminals. The battery’s serial charging plug has 4 terminals. You need to plug it in the way that the 3 black wires mate with the first 3 terminals from the left on the socket and the 4th red wire mates with the 4th terminal on the socket, leaving the 5th terminal on the socket free/unconnected.
Once you have these steps done, your battery should start charging. If it does not, that is, if it still stays in standby, just click on the button once. That will activate the charging routine. In case the ampere setting changes, short-press and cycle through the amperage settings to bring it back to 1.0A.
You must charge the battery at 1.0A and 4.20V, any other setting is incorrect for immediate use. For long term storage, please charge the battery with 1.0A and 3.85V.
You should have your battery charging at this point. If it does not, then either the battery is dead or the charger is faulty.
Please let me/us know if the above steps worked for you!
Regards,
Girish
Hi @girishkumar.kannan ,
Thank you for your help and the detailed steps!
After I read your message, I looked much closer at the charger’s screen, and I think I’ve found the specific problem.
In my photo, the charger shows the voltage for each individual cell:
Cell 1 is dead as it doesn’t appear
Cell 2 is at 3.175V
Cell 3 is at 0.398V
Because Cell 3 is at 0.398V (almost zero), the battery itself must be damaged. The smart charger sees this low voltage on one cell and is stopping the charge for safety, which is why it just stays on “Standby.”
I also believe this explains the “No route to host” SSH error. The robot’s battery is dead, so the robot won’t power on. If the robot isn’t on, my computer has no way to connect to it.
It seems the root of both problems is this damaged battery. I will need to safely dispose of this one and get a new battery.
Thank you again for your help in figuring this out!