ROS Control content clarification in Unit 3, 4 and 5

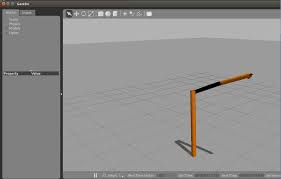
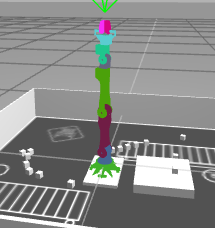
In ROS Control, Unit 3 and 5, we are creating and implementing controllers for RRbot and Manipulator respectively.
imageimage

Question 1:
In Unit 4, using rrbot, we want it to move to a position, based on input.

Here, we are inputting Position to get an Effort output. if we wanted an effort outcome, why not just give effort itself as input to the effort controller and use JointEffortController instead of JointPositionController which has to convert the position to effort?

The YAML file content:

rrbot:
  joint_state_controller:
    type: joint_state_controller/JointStateController
    publish_rate: 50  

  joint1_position_controller:
    type: effort_controllers/JointPositionController
    joint: joint1
    pid: {p: 100.0, i: 0.01, d: 10.0}
  joint2_position_controller:
    type: effort_controllers/JointPositionController
    joint: joint2
    pid: {p: 100.0, i: 0.01, d: 10.0}

Question2:
Launch file for rrbot :

<launch>

  <rosparam file="$(find my_robot_control)/config/my_robot_control.yaml" command="load"/>

  <node name="controller_spawner" pkg="controller_manager" type="spawner" respawn="false"
    output="screen" ns="/rrbot" args="joint1_position_controller joint2_position_controller joint_state_controller"/>

  <node name="robot_state_publisher" pkg="robot_state_publisher" type="robot_state_publisher"
    respawn="false" output="screen">
    <remap from="/joint_states" to="/rrbot/joint_states" />
  </node>

</launch>

Launch file for Manipulator:

<launch>

 <!-- Load configuration file -->
  <rosparam file="$(find om_control)/config/om_control.yaml" command="load"/>

  <!-- Start joint state controller -->
  <node name="joint_state_controller_spawner" pkg="controller_manager" type="controller_manager" output="screen"
    args="spawn joint_state_controller" respawn="false"/>

  <!-- Start arm controller -->
  <node name="arm_controller_spawner" pkg="controller_manager" type="controller_manager" respawn="false" output="screen" args="spawn arm_controller"/>

  <!-- start robot state publisher -->
  <node pkg="robot_state_publisher" type="robot_state_publisher" name="robot_state_publisher" output="screen">    <param name="publish_frequency" type="double" value="100.0" />
    <param name="tf_prefix" type="string" value="" />
  </node>

  <!-- start fake calibration -->
  <node pkg="rostopic" type="rostopic" name="fake_joint_calibration"
        args="pub /calibrated std_msgs/Bool true" />

</launch>

Question 2A) Now comparing both the launch files, why are we using different python files type=" spawner" in rrbot and type="controller_manager" in Manipulator to run the controllers? is’t the controller manager common to all the controllers?

For rrbot:

node name="controller_spawner" pkg="controller_manager" type="spawner"----

For Manipulator:

node name="arm_controller_spawner" pkg="controller_manager" type="controller_manager"---

Question 2B) In rrbot launch file, we launched all the controllers under a single node, as arguments, including the joint state controller as shown below

args="joint1_position_controller joint2_position_controller joint_state_controller"/>

But when we are launching the Manipulator, we are using 3 separate nodes to do so, why are we taking this approach?

<node name="arm_controller_spawner"----------
<node pkg="robot_state_publisher"---------------
<node pkg="robot_state_publisher"------------

Question 3)
What is the purpose of args=“spawn” in launch file of Manipulator?

  <node name="joint_state_controller_spawner" pkg="controller_manager" type="controller_manager" output="screen"
    args="spawn joint_state_controller" respawn="false"/>

 <node name="arm_controller_spawner" pkg="controller_manager" type="controller_manager" respawn="false" output="screen" args="spawn arm_controller"/>

Question 4)
Upon running the launch files mentioned above, we get the below mentioned topics

rrbot:
image

And In Manipulator:
image

Now i could not find any mention of a python file in the course content that lead to the generation of the topics /rrbot/joint1_position_controller/pid/parameter_description and /rrbot/joint1_position_controller/pid/parameter_updates in rrbot and also the code that lead to the generation of the action server related topic /arm_controller/follow_joint_trajectory/cancel , /result , /status etc in Manipulator.

Could you tell me how these topics were created since they were not generated by the controller package, while /command, /state, and /joint_states are created by the controller package?

Question 5:
In Unit 4, source code my_controller.cpp ,used to create custom controllers, is written in C++. Would you happen to have this code in python, since the C++ version is a bit more tricky to work and i am proficient, at the moment, only in Python.

Can you also do the same for unit 6 - Hardware Abstraction Layer, since all the code (though the general concept is explained) is written in C++ .
Question6:
The following is the explanation on Transmission from the course content, and i found similar explanantion on wiki ros too.

The transmission elements are used to describe the relationship between a joint and an actuator. A transmission transforms efforts/flow variables such that their product - power - remains constant.

Can you tell me what role Transmission element plays in Layman Terms?

Question 7:
What are the instances where PIDs are used in controller configuration? I am asking because PIDs were used in rrbot , but not in Manipulators, why is that? I thought PIDs were used in all the controllers irrespective of the input or output.

Question 8:

<node pkg="robot_state_publisher" type="robot_state_publisher" name="robot_state_publisher" output="screen">    
    <param name="publish_frequency" type="double" value="100.0" />
    <param name="tf_prefix" type="string" value="" />
</node>

Can you tell me what the following variables are for since this is the first time I am seeing additional variables being added to robot_state_publisher? (No additional args used in TF chapter where this was introduced)

  • name=“publish_frequency” type=“double” value=“100.0” ?

  • name=“tf_prefix” type=“string” value="" ?


I understand that this is quite a lot, but if you could help me solve this, i would really appreciate it.

Thanks in advance

Hello @Joseph1001 ,

Many thanks for your question. It is very well structured and it also provides feedback for the course (it points to some things that need to be clarified or explained better). It’s not possible for me to answer it now due to time limitations, however, I’ll try to take some time on Saturday in order to properly answer all your points.

1 Like

@albertoezquerro ,thanks for taking my queries. Construct’s quick response to fix bugs and improve content is really admirable.

Hello @Joseph1001,

I will answer your first question:

In Unit 4, using rrbot, we want it to move to a position, based on input.

Here, we are inputting Position to get an Effort output. if we wanted an effort outcome, why not just give effort itself as input to the effort controller and use JointEffortController instead of JointPositionController which has to convert the position to effort?

In this exercise the goal is to have an position outcome because we want to show how to create a controller that is able to command a robot to a certain position.

The reason why the controller is defined as an input effort and output position is the following:

Input: we are modeling a robot motor that accepts voltage as input (not the position or velocity directly) therefore we use an effort joint as input.

Output: Regarding the state of the robot arm, we are modeling an encoder that reports the actual position as feedback (not a torque sensor that would provide “effort” as output")

As a consequence the controller we use is of type “effort_controllers/JointPositionController”.

If you wanted to control the effort of a joint then you would put a JointEffortController as the input and use a controller of type “effort_controllers/JointEffortController” In that case you would also need a sensor on your robot capable of measuring effort (torque).

Another example: If you would want to model a hardware that takes in position as input and a sensor that outputs position then you would change the code from the exercise to use a controller of type “position_controllers/JointPositionController”.

Hope this helps,

Roberto

1 Like

Hi @rzegers , thanks for helping out. :grinning:

You are right, the controller_manager is common to all the controllers. You can call it directly or through the services it exposes for loading/unloading and starting/stopping controllers.
When you execute the spawner node you are running a python script (that is part of the controller_manager package) which internally leverages the ROS services provided by the controller_manager.

In other words the spawner is a convenience script provided by the controller_manager package.

The benefit of the spawner is that it loads AND starts a set of controllers at once. And when you kill the spawner (ctrl-c) it will automatically stop and unload all controllers it initially started.

This is specially useful for spawning a set of controllers from roslaunch.

Hope this clarifies things a bit for you.

Cheers,

Roberto

1 Like

Hello @Joseph1001

Here I will answer your question 2b:

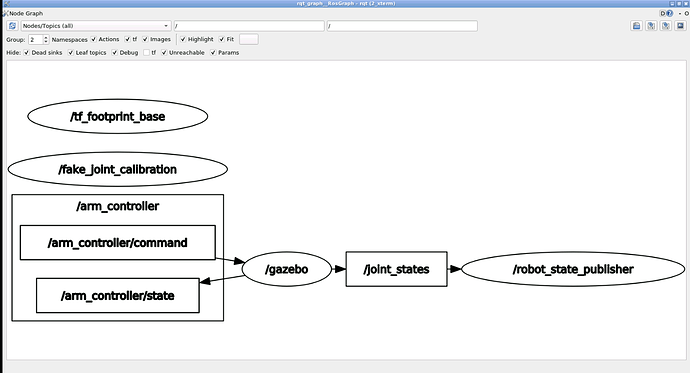
ros_control is very flexible with regards on how you launch and manage controllers, additionally some of the terms chosen are not always self-explanatory and I think this is the case. So to clarify a bit the term “controller_manager”: “controller_manager” is a ROS node that manages the controllers just as explained in the course, so far nothing new. However, “controller_manager” is also a python script provided by the controller_manager package that you can use to interact with the controller_manager node. This is confusing because on one side you have the “controller_manager” node and on the other side you have the “controller_manager” python script.

So when launching the manipulator you are not launching two separate “controller_manager” nodes but calling two times the “controller_manager” script.

You can check that you have only one “controller_manager” node by running:

rosrun rqt_graph rqt_graph

Then open the graphical tools and wait until rqt_graph opens.
On the top select “Nodes/Topics (all)” from the dropdown.

You will see that there is only one “controller_manager” node.

1 Like

Hello @Joseph1001,
regarding your next question:

The args attribute of the node tag is used to include commands in a launch file the same way you write those commands on the actual command line.

From the controller_manager documentation you can see that the spawn argument is used to both load AND start a controller. Other possible arguments are “load”, “unload”, “start”, “stop”, “kill”.

Please comment if something is unclear.

Regards,

Roberto

1 Like

Thank you @rzegers. Would you also happen to know the answers to the rest of the questions? If you could point me in the right direction, like say a website,that could help with the remaining questions, i would really appreaciate it.

Hello @Joseph1001 No worries I will be answering your questions on the next couple of days and will point you to references or resources for further information.

1 Like

When the controllers are running, they create a set of ROS topics that can be used for getting and sending information.

For example, the topics created by the “joint1_position_controller” of type “effort_controllers/JointPositionController” are:

/rrbot/joint1_position_controller/state
/rrbot/joint1_position_controller/command
/rrbot/joint1_position_controller/pid/parameter_description

rrbot is the namespace, and the last two topics are generated if one or more effort based PID position controllers are loaded, as in this case.
These topics contain the parameters used for tuning the position controllers. This way they can be accessed by other nodes or by the user.

In the case of the manipulator, these topics are created because we are running a controler of type “position_controllers/JointTrajectoryController”.

To get more information on one of these topics recall the command rostopic info <name_of_topic>

For further information on the joint_trajectory_controller visit:
http://wiki.ros.org/joint_trajectory_controller

1 Like

As you already know ROS makes it easy for a programmer to write a ROS nodes using either C++ or Python. However if we dig deeper into the core libraries of ROS we will notice that most of them are written in C++. But why?

Take for instance motor and sensor control, computer vision or artificial intelligence libraries. In order to be optimized for real-time performance these libraries need to interact directly with low-level hardware. This is where C++ comes into play because it has special syntax that allows to directly modify memory which is key to performance. Python just doesn’t has this syntax available because it does the memory management automatically for you. As a consequence many of the underlying libraries in ROS are written in C++.

This is also the case of ros_control. And in the particular case of the my_controller.cpp file that you describe, it depends directly in libraries that are written in C++ so the controller must be written in C++ as well. There is no Python version of ros_control available. This is the reason why C++ is listed as one of the requirements of the ros_control course.

In order to make the C++ code easier to read and understand, we include an explanation piece by piece in our own words. These additional explanations are aimed to be less technical compared to reading just the code and should provide a high level understanding of what is going on. If one of these explanations in not that clear to you please do not hesitate to ask for further clarification and we can rephrase them here at the forum for better understanding.

1 Like

Hi @rzegers , thanks for your reply.

The thing is, the explanation of the intent of a line of code does is explained well using the comments and i think they did a good job at that.

I am having trouble with the concepts in the code. i am new to C++ and my knowledge on C++ comes solely from the C++ course that Construct provides. Though the basics are explained well in the training course, most of the concepts in C++ program in ROS_Control course are not covered in the training course. It would have been great if the C++ training course covered wider topics.

Question :
So, if i understand you correctly, the controllers are chosen based on the output we want, but also the device we use to measure that output (position encoders in this case). am i right?

One of the simplest transmissions you can have is a gear reduction. For instance you could have a pair of spur gears that reduces the speed of the actuator output (a motor) and increases the torque on a parallel connected shaft. The <transmission> tag exists so that ros_control knows about changes for instance in output speeds or torque due to mechanical transmission that affect the feedback loop of the control system. Although you might have already read the ROS documentation I will post a link here as a reference to other students: urdf/XML/Transmission - ROS Wiki

Hello @Joseph1001,

rrbot uses a controller of type effort_controllers/JointPositionController
This effort-based position controller uses a basic PID loop.

The controller used by the manipulator is of type position_controllers/JointTrajectoryController
which simply passes the command signal down to the joint.

1 Like

Hello @Joseph1001,

this is what those parameters stand for:

tf_prefix: Sets the tf prefix for namespace-aware publishing of transforms. See tf_prefix for more details.

publish_frequency: this is the publish frequency of state publisher, default: 50Hz.

Source: http://wiki.ros.org/robot_state_publisher

Edit:

Hello @Joseph1001,
the forum does not allow more than 3 consecutive replies to a question, so I it is very difficult to post an answer to your new questions. My solution here is to edit the previous answer, but this is not optimal. I think I would be easier for other students to find an answer if they have a similar question if you create a new question on the forum rather posting a new question as a response to an previous question, otherwise the forum could mess it up and become unreadable.

Question 1:
So, if i understand you correctly, the controllers are chosen based on the output we want, but also the device we use to measure that output (position encoders in this case). am i right?

Yes, you choose the type of controller to use depending on the type of input that you pass into the hardware abstraction layer and the type of output produced by it, to drive a joint. Remember that your hardware abstraction layer could implement a velocity interface, position interface or effort interface which in turns communicates with the real hardware.

Question 2:
Now, i am a bit confused about the quote above. don’t all devices receive signals as voltages? and doesn’t servo motors receive position commands as input and move to that location?

Your firmware API could have different mode of operation (voltage, position, velocity). Your hardware abstraction layer has to send a command value that is appropriate for the mode of operation set,.Your actuators firmware might then convert the commanded value into PWM or other hardware specific commands to the physical hardware.

1 Like

i came across content that i think is an error:Please look into it. In unit 6 hardware abstraction Layer,
The code in the screenshot:

Should have been:

1 Like

Thanks for your correction. We are going to update the notebook.

Apart from that, please post the remaining questions as a new question so we can close this thread which contains too many different questions

1 Like